728x90
반응형
추가 list 정리
- projectapp은 혼자 만들어보고 진행
- Project와 Article을 연결하는 작업
- MultipleObjectMixin 을 이용해서 ProjectApp 의 Detail 페이지를 마무리
- 같은 방식으로 AccountApp 의 디테일 페이지도 수정
projectapp/models.py
from django.contrib.auth.models import User
from django.db import models

from projectapp.models import Project


class Article(models.Model):
    writer = models.ForeignKey(User, on_delete=models.SET_NULL, related_name='article', null=True)
    project = models.ForeignKey(Project, on_delete=models.SET_NULL, related_name='article', null=True)
    title = models.CharField(max_length=200, null=True)
    image = models.ImageField(upload_to='article/', null=False)
    content = models.TextField(null=True)
created_at = models.DateField(auto_now_add=True, null=True)- writer 필드 : 작성자, user 탈퇴시에도 게시글 삭제되지 않음(SET_NULL)
- project 필드 : 누구의 게시글인지 Article과 Project를 연결
- image 필드 : 이미지는 항상 article/ 밑에 경로에 저장
- created_at 필드 : 생성됬을 때 자동으로 생성시간 저장
forms.py
from django.forms import ModelForm

from articleapp.models import Article


class ArticleCreationForm(ModelForm):
    class Meta:
        model = Article
fields = ['title', 'image', 'project', 'content']- 추가된 project 필드 create form에 추가
마이그레이션
- 추가된 필드 DB에 반영
ln View Using Mixin
projectapp/views.py
class ProjectDetailView(DetailView, MultipleObjectMixin):
    model = Project
    context_object_name = 'target_project'
    template_name = 'projectapp/detail.html'

    paginate_by = 25

    def get_context_data(self, **kwargs):
       object_list = Article.objects.filter(project=self.get_object())
return super(ProjectDetailView, self).get_context_data(object_list=object_list, **kwargs)- 여러개의 오브젝트들을 다룰 수 있는 Mixin인 MultipleObjectMixin추가
- pagination 25개 제한 설정
- Article 오브젝트 가져와서 필터링 한 후 object_list 변수에 저장후 return
- 탬플릿 창에서 object_list를 가져와서 필터링한 게시글들을 사용할 수 있음
list_fragment.html
{% load static %}


<style>
<!--모바일 반응형 css 추가 -->
.container {
    padding: 0;
    margin: 0, auto;
}

.container a {
    width: 45%;
    max-width: 250px;
}


.container div {
  display: flex;
  justify-content: center;
  align-items: center;
  border-radius: 1rem;
}

.container img {
  width: 100%;
  border-radius: 1rem;

}


</style>

<!-- article 글 있으면 보여주기-->
{% if article_list %}
<div class="container">
    {% for article in article_list %}
    <a href="{% url 'articleapp:detail' pk=article.pk %}">
        <div>
            <!-- for문의 article이 card.html 의 article과 같다  -->
            {% include 'snippets/card.html' with article=article %}
        </div>
    </a>
    {% endfor %}
</div>
<script src="{% static 'js/magicgrid.js' %}"></script>
{% else %}
<div style="text-align: center">
    <h1>No Articles YET!</h1>
</div>
{% endif %}

<!--페이지네이션 버튼 추가-->
{% include 'snippets/pagination.html' with page_obj=page_obj %}

<div style="text-align:center">
    <a href="{% url 'articleapp:create' %}" class="btn btn-dark rounded-pill col-3 mt-3 mb-3 px-3">
      Create Article
    </a>

</div>- article detail페이지 복사해서 따로 html생성
projectapp/detail.html
 <div>

        {% include 'snippets/list_fragment.html' with article_list=object_list %}

</div>- 게시글에 따른 article 글 보이도록 html연결
- views.py에서 전달받은 필터링된 object_list를 article_list로 html에 전달
accountapp/views.py
class AccountDetailView(DetailView, MultipleObjectMixin):
    model = User
    context_object_name = 'target_user'
    template_name = 'accountapp/detail.html'

    paginate_by = 25

    def get_context_data(self, **kwargs):
        object_list = Article.objects.filter(writer=self.get_object())
return super(AccountDetailView, self).get_context_data(object_list=object_list, **kwargs)- account 페이지도 동일한 방식으로 작성자에 따른 article 추가
accountapp/detail.html
    <div>

        {% include 'snippets/list_fragment.html' with article_list=object_list %}

</div>- views.py에서 전달받은 필터링된 object_list를 article_list로 html에 전달

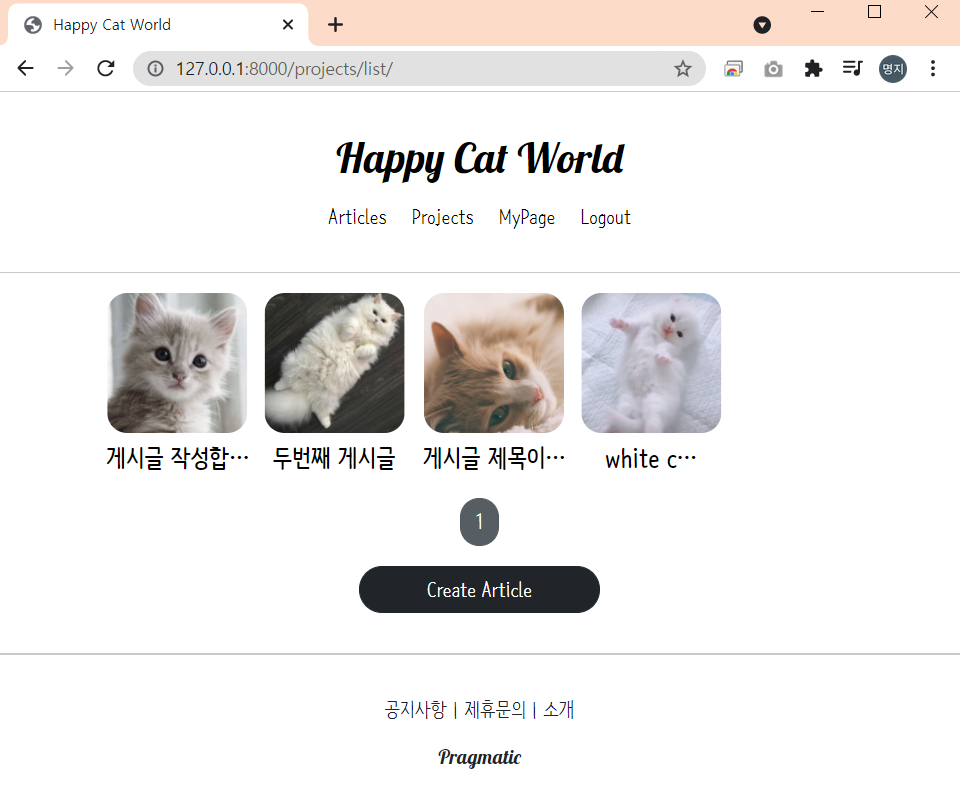
- Project 게시글 페이지

- 게시판 detail 페이지
- 게시판에 따른 작성 글 목록보임

- Myprofile 에도 작성자가 작성한 글만 보임
반응형
'Backend > Django' 카테고리의 다른 글
| django 30. Field Lookup을 사용한 구독 페이지 구현 (0) | 2021.10.18 |
|---|---|
| django 29. RedirectView을 통한 SubscribeApp시작 (0) | 2021.10.13 |
| django 27. 모바일 디버깅, 반응형 레이아웃 (0) | 2021.10.12 |
| django 26. Commentapp 마무리 (0) | 2021.10.12 |
| django 25. Mixin 소개 및 Commentapp 구현 (0) | 2021.10.12 |
